Guardians: phases, tells and the run you should leave
Guardians are the run’s exam. The store confirms they grow deadlier and gain phases; official alpha footage gives us one name and one arena. This page covers the fight structure, the named example, and the decisions around it.
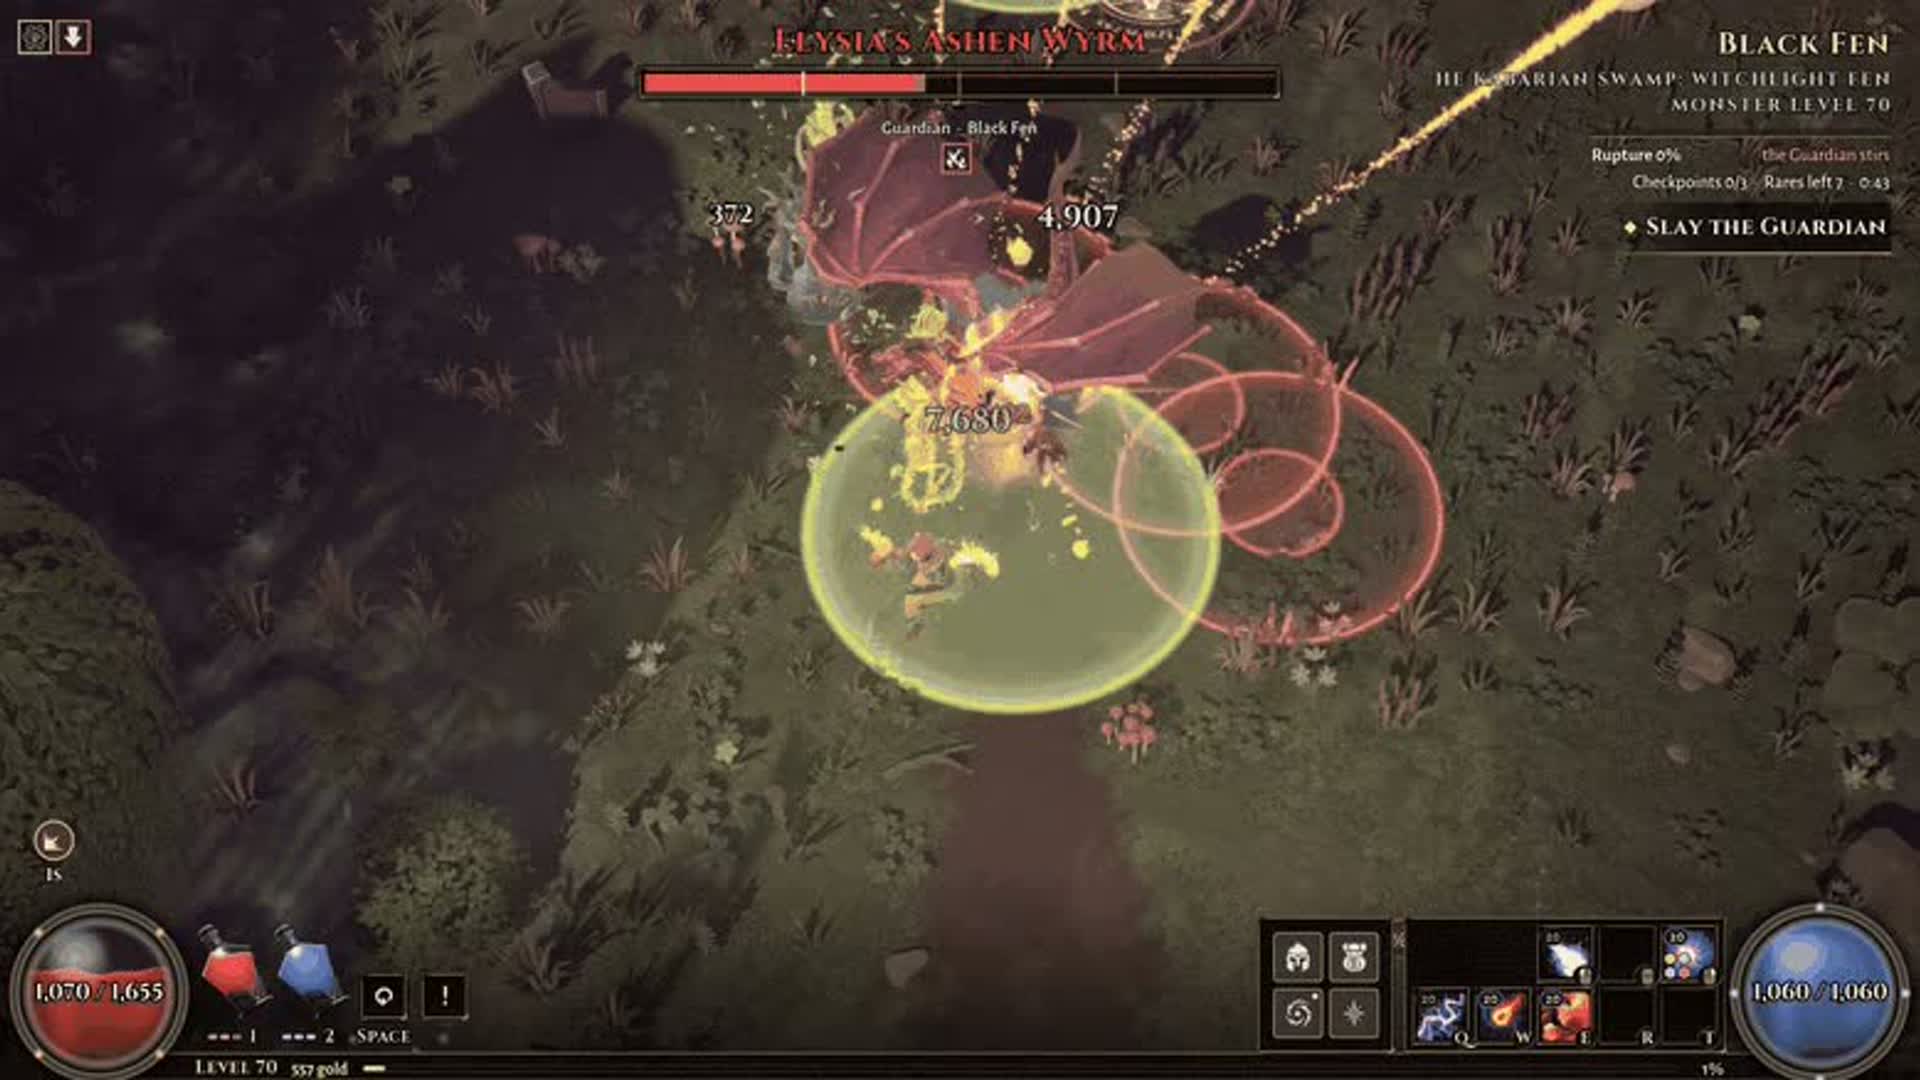
Elysia’s Ashen Wyrm — the one Guardian we can name
Official alpha footage shows a Guardian intro card: “ELYSIA’S ASHEN WYRM — GUARDIAN OF BLACK FEN”, with the line “ELYSIA’S BROOD STILL SMOLDERS WHERE THE ASH WEAVER FELL.” The objective reads “SLAY THE GUARDIAN”; the status reads “the Guardian stirs”.
| Element | Reading | Confidence |
|---|---|---|
| Name | Elysia’s Ashen Wyrm | Observed |
| Title | Guardian of Black Fen | Observed |
| Arena | Black Fen, in the Kabariah Swamp region | Observed |
| Objective | SLAY THE GUARDIAN | Observed |
| Flavour | “Elysia’s brood still smolders where the Ash Weaver fell.” | Observed |
| Phases, attacks, drops | Not shown in the card | Unknown |
What a phase actually changes
“Gaining new attacks and phases” is a design statement, not a mechanic. In practice, a phase change usually does one or more of these things. Watch for which one the fight uses; it tells you what to solve.
| Pattern | What you see | What to do |
|---|---|---|
| Adds | The boss summons help or the arena fills | Clear the adds or ignore them deliberately — do not split damage by accident |
| Arena shrink | Safe ground disappears or hazards spread | Pre-position before the phase; do not start it in a corner |
| Damage check | A shield, a heal or a timer | Save your burst and your flask for this window |
| Attack upgrade | The same tell, a faster or multi-hit follow-up | Learn the first tell, then expect the second hit |
| Immunity | The boss becomes untargetable | Use the window to reposition, not to stand still |
| Element swap | The arena or the boss changes colour | Check whether your damage type is still effective |
Before you enter
- Read the run modifiers. A +damage modifier matters more in a boss fight than in a pack.
- Check your flasks. A boss attempt with empty charges is a wasted life.
- Know your burst window. If your damage depends on a vow or a curse, confirm the cost before the fight.
- Clear the arena approach. Fighting a Guardian with a rare pack behind you is how runs end.
- Decide your abandon line. If the boss is at 70% and you have one life, leave.
How to learn a Guardian without wasting runs
-
First attempt: watch the feet
Most tells start in the lower body. Watch the boss’s stance, not the health bar.
-
Second attempt: count the combo
Is the third hit the dangerous one? Does the boss pause before a follow-up? Count out loud.
-
Third attempt: test the edge
Stand at the range you actually want to fight from. If the boss has a gap-closer, you need to know its cooldown.
-
Then optimise damage
Do not theorycraft a damage window before you can survive the phase. Survival first, uptime second, damage third.
What the HUD tells you before the fight
The official screenshots show a named enemy health bar at the top of the screen — for example Glade Sprite and Crypt Hound. These may be rares rather than Guardians; the UI does not label the difference in the screenshots. What matters is the pattern: a named bar, a large health pool and a fight that takes longer than a pack.
Named enemies: what is a Guardian?
| Name | Where seen | Classification |
|---|---|---|
| Elysia’s Ashen Wyrm | Black Fen — Guardian of Black Fen | Confirmed Guardian by the intro card |
| Crypt Hound | Volcanic/crypt-like map | Named elite or boss; not labelled as a Guardian |
| Glade Sprite | Forest map | Named elite or boss; not labelled as a Guardian |
The UI shows a name and a health bar; it does not label the last two as Guardians. Do not assume every named bar is a Guardian.
When to leave a run
- You have one life and the boss has more than half health.
- Your damage is clearly below the boss’s sustain or shield.
- The arena modifier overlaps with your build’s worst defence.
- You are playing tired. The second death is usually a decision, not a mistake.